World Famous – For a Reason
Why Lake Louise Looks Unreal on Camera
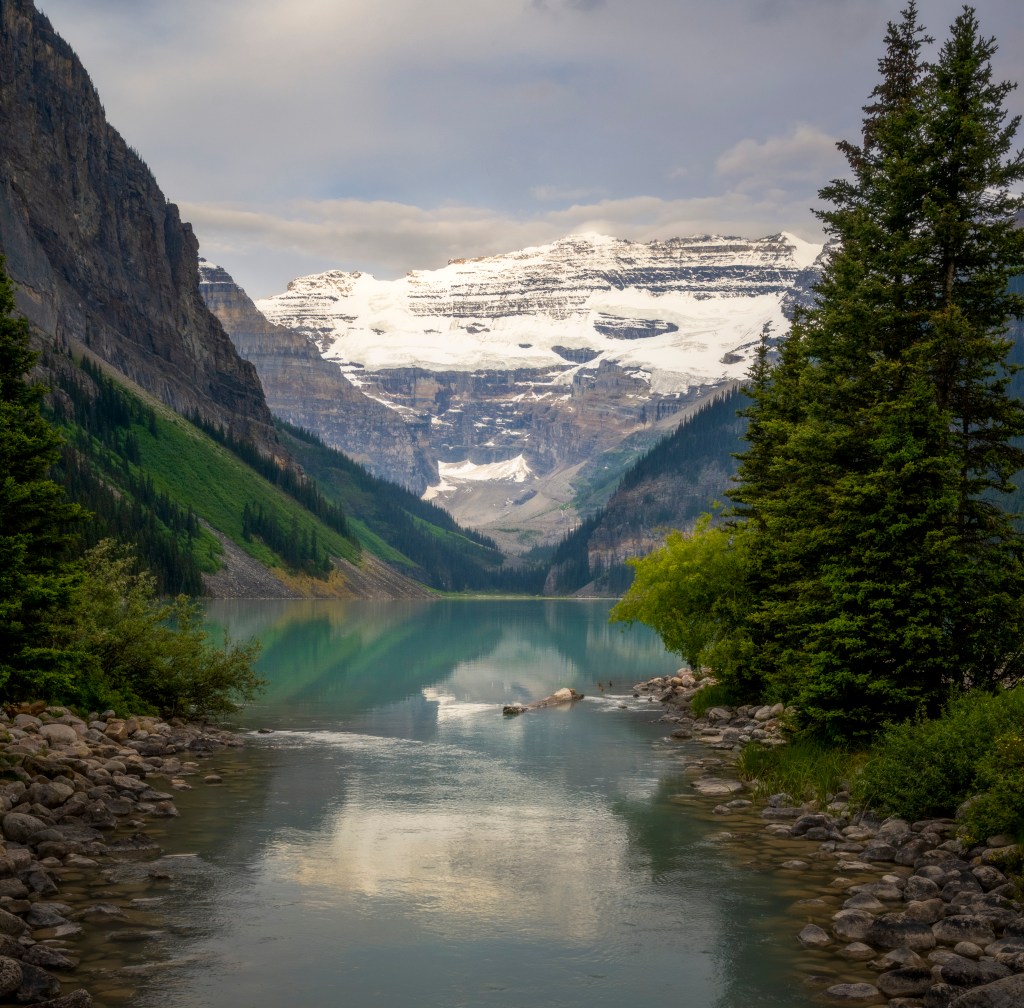
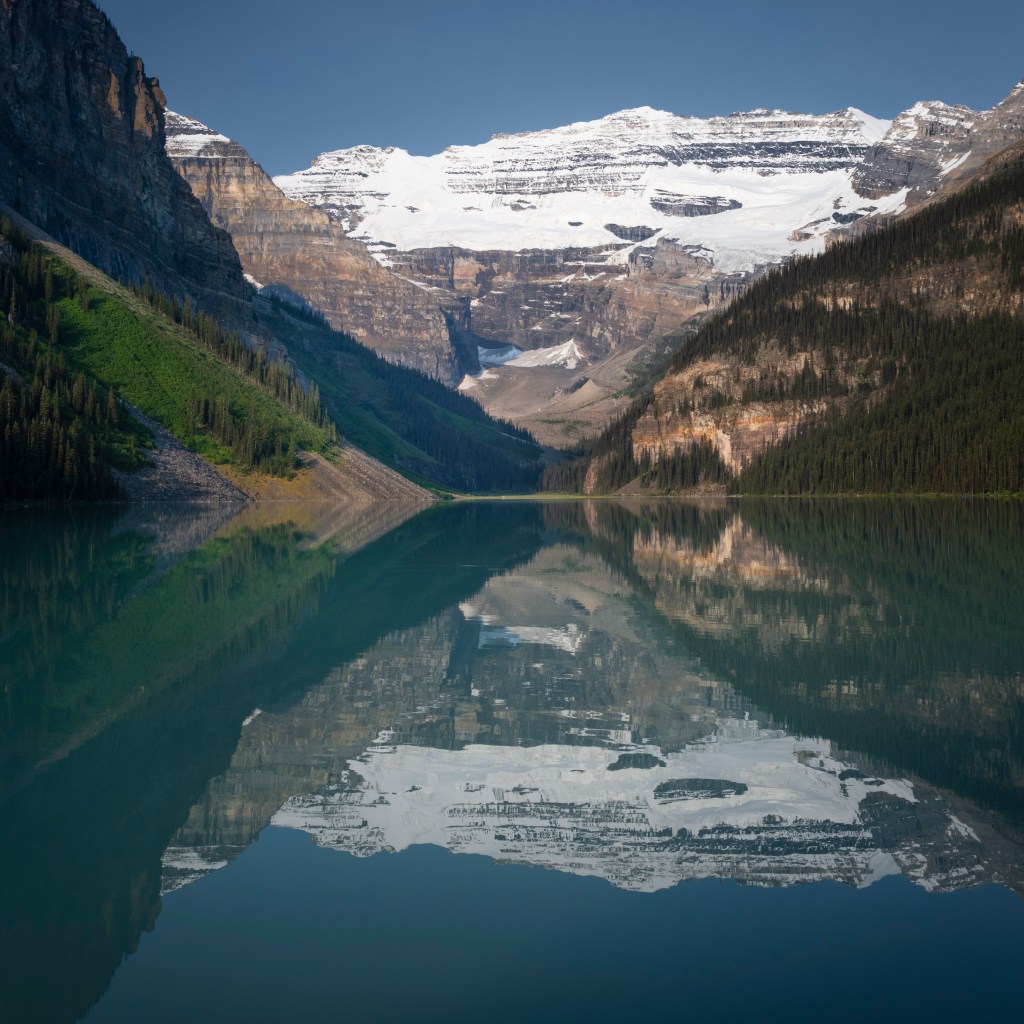
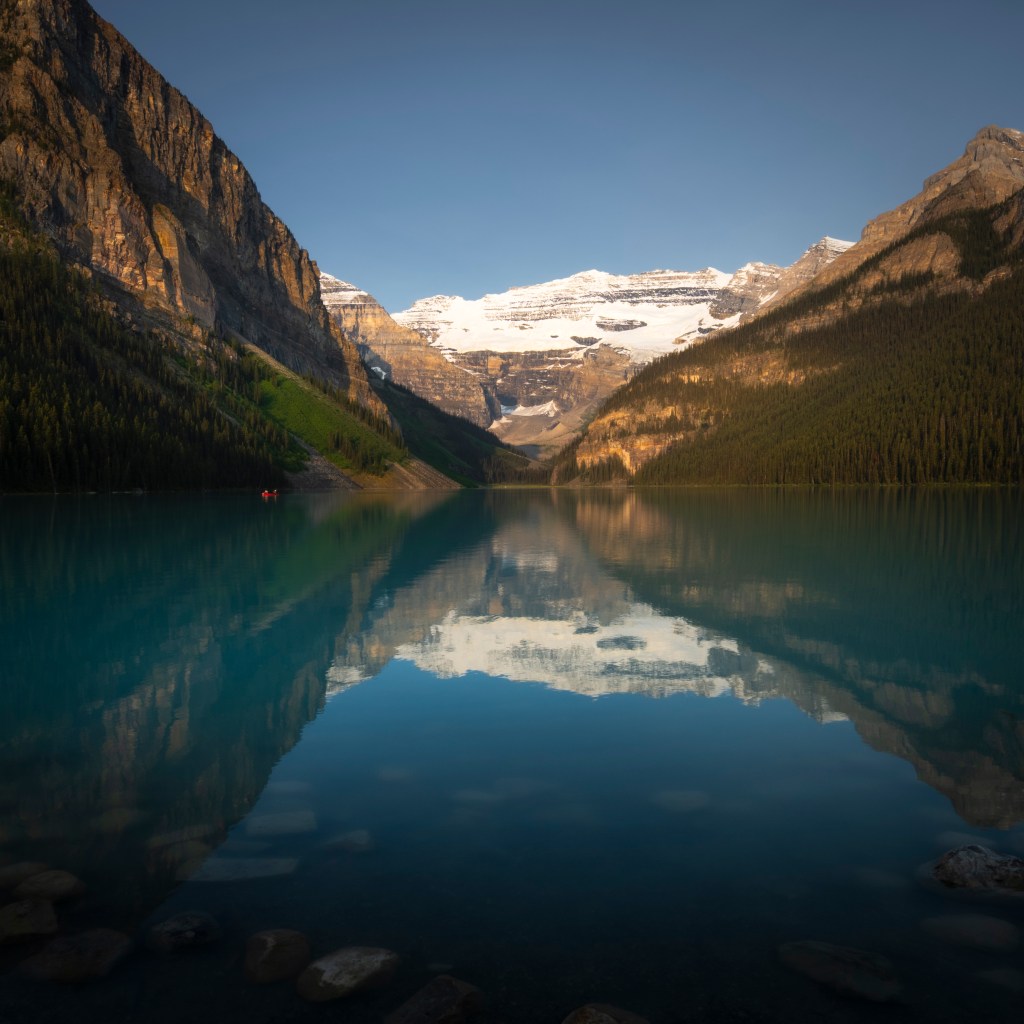
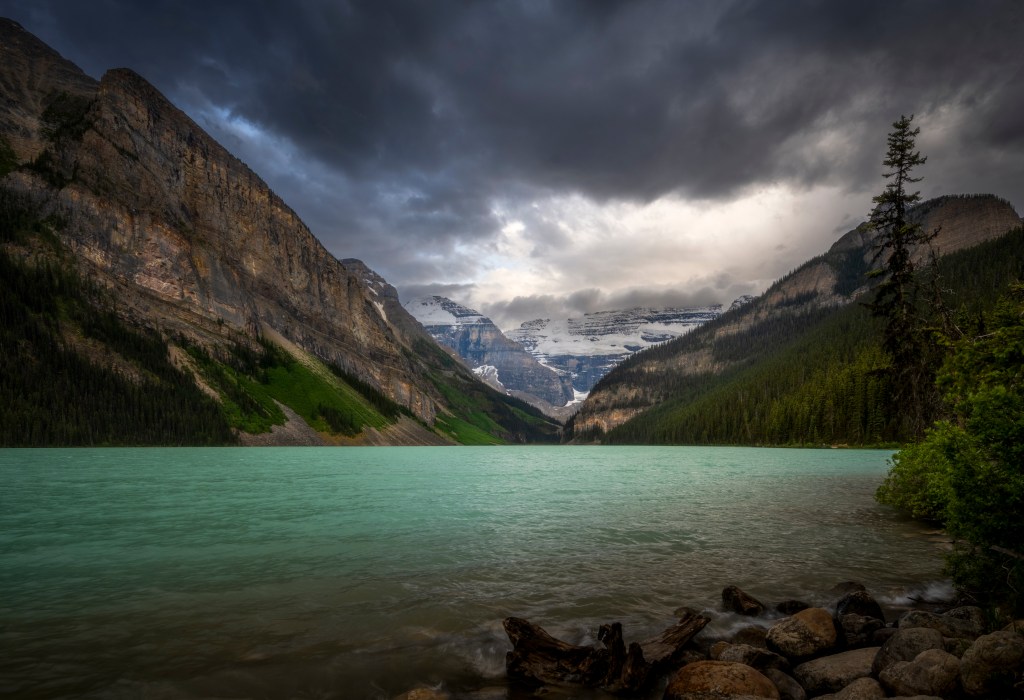
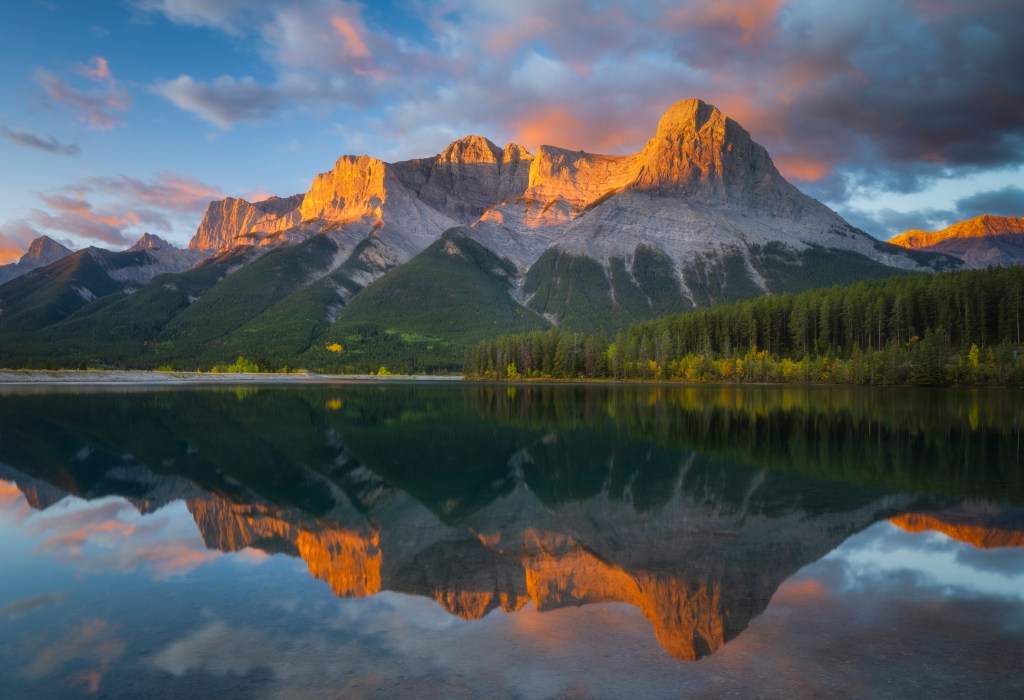
If you asked an AI image bot to create a “perfect” Canadian Rockies scene, it would probably land on something very close to Lake Louise: Mount Victoria rising at the back of the frame, Fairview Mountain shaping the left edge, Mount Whyte on the right, and glacial water that can swing from turquoise to emerald depending on the light. On a calm morning, the lake becomes a natural mirror—one of the most photogenic reflections in the Rockies.
Known as “Lake of the Little Fishes” to the Stoney Nakoda peoples—stewards of this region for thousands of years—Lake Louise is also one of the busiest locations in Banff National Park. The crowds are real, but so are the compositions. Below is a photographer-focused walk-through of where to shoot, when to arrive, and how to come home with frames that feel calm—even when the shoreline isn’t.
Quick Checklist (Before You Go)
- Must-get frames: (1) Mount Victoria reflection from the main shore, (2) canoe hut “sense of place” shot, (3) tight telephoto crop of glacier/ridgelines.
- Arrive: Aim for 30–60 minutes before sunrise for the calmest water and cleanest reflections.
- Lenses: Wide-angle for the iconic shoreline scene; short telephoto to simplify and isolate details; long telephoto if you’ll shoot from the ski hill across the valley.
- Support: Tripod for blue hour/sunrise and careful framing.
- Filter: Circular polarizer to control glare (use gently with the ultra-wide lens).
- Clothing/gear protection: Dress in layers and pack a dry cloth for mist, drizzle, or spray.
- Crowd strategy: Shoot early, work tighter when needed, and wait for natural gaps—patience beats cloning later.
Enjoying this guide? Subscribe to get new location breakdowns, field notes, and practical shooting tips.
Capturing that Iconic View
The classic Lake Louise composition reveals itself the moment you step onto the main shoreline: straight ahead, Mount Victoria centered in the valley and reflected in the lake. Start wide to establish the scene, then work tighter to simplify the frame and emphasize Mount Victoria, the ridge lines, and the symmetry of the reflection.
From this main viewpoint, it’s hard to find a “bad” angle—use shoreline rocks, low shrubs, and the waterline as foreground anchors. Move your feet, change your height, and look for leading lines around the outlet and the small bridge (great for guiding the eye into the center of the frame).
For the cleanest reflections and the most flexibility with compositions, arrive before sunrise. The peaks catch first light early, and winds are typically calmest in the pre-dawn window—when the lake can look like glass. The second benefit is obvious: fewer people in-frame, fewer tripods to work around, and more time to slow down and refine your shot.
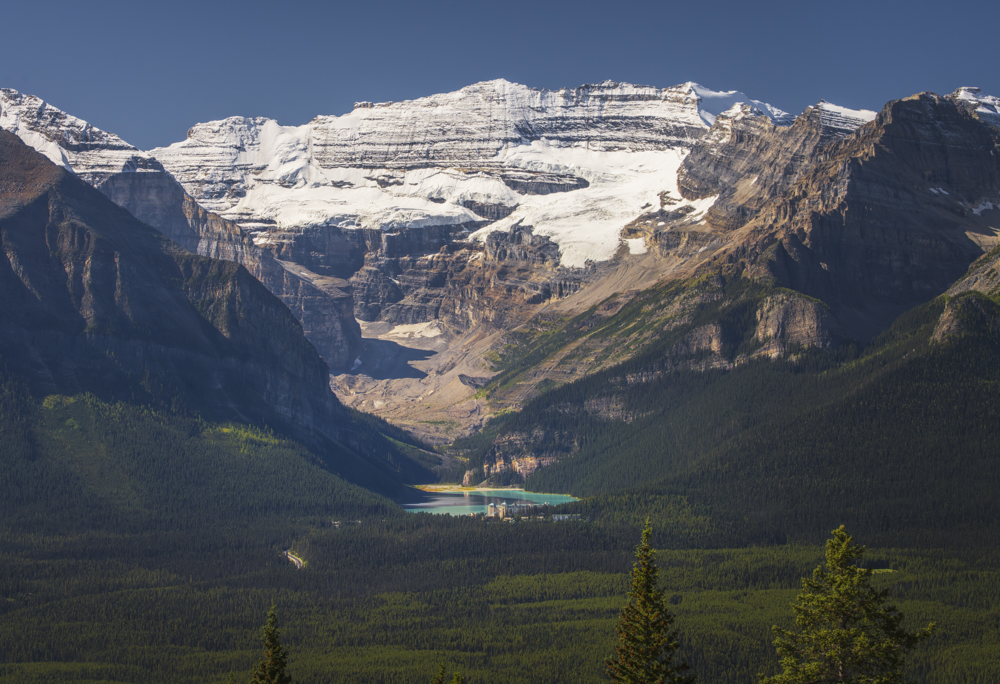
For a completely different perspective, shoot from across the Bow River Valley at the Lake Louise Ski Resort. In summer and fall, the gondola can put you high enough for layered, compressed views of the lake and surrounding peaks. Bring a long telephoto (a 100–400mm-class lens is ideal) and zoom into the lake, the stacked ridgelines, and pockets of light breaking through mountain peaks.
For a Different Angle: Shoreline Walks and Storytelling Details
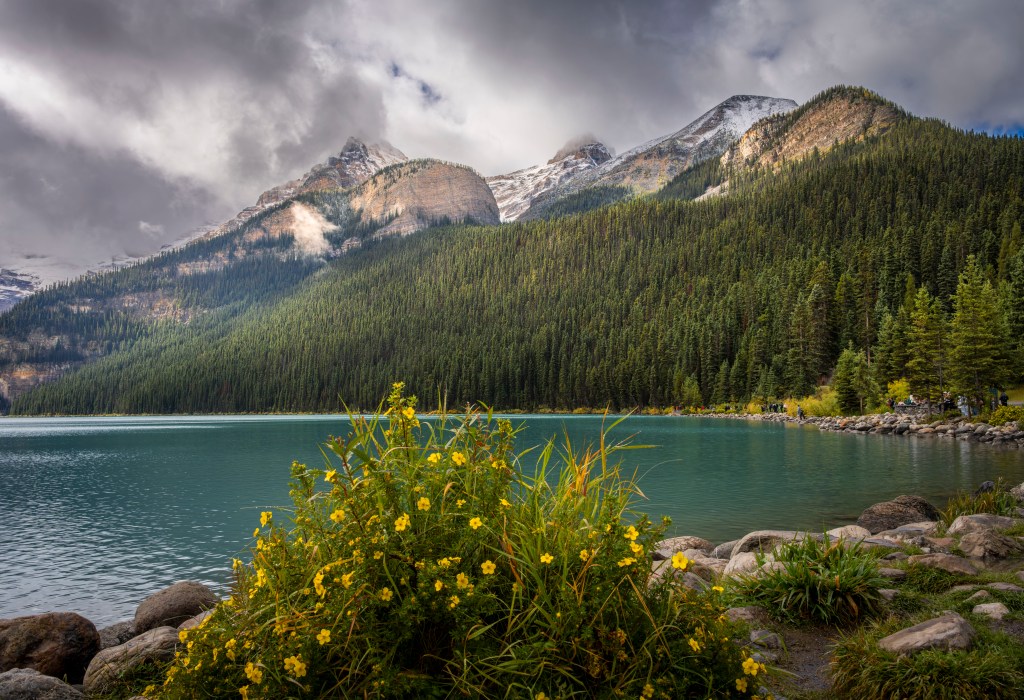
Facing Mount Victoria, take the path on the right-hand side of the lake. It follows the shoreline toward the Six Glaciers area and gives you a steady stream of new foregrounds—evergreens, shoreline boulders, and the subtle S-curve of the water’s edge. As you walk, keep checking the lake surface: reflections can appear and disappear with small gusts of wind.
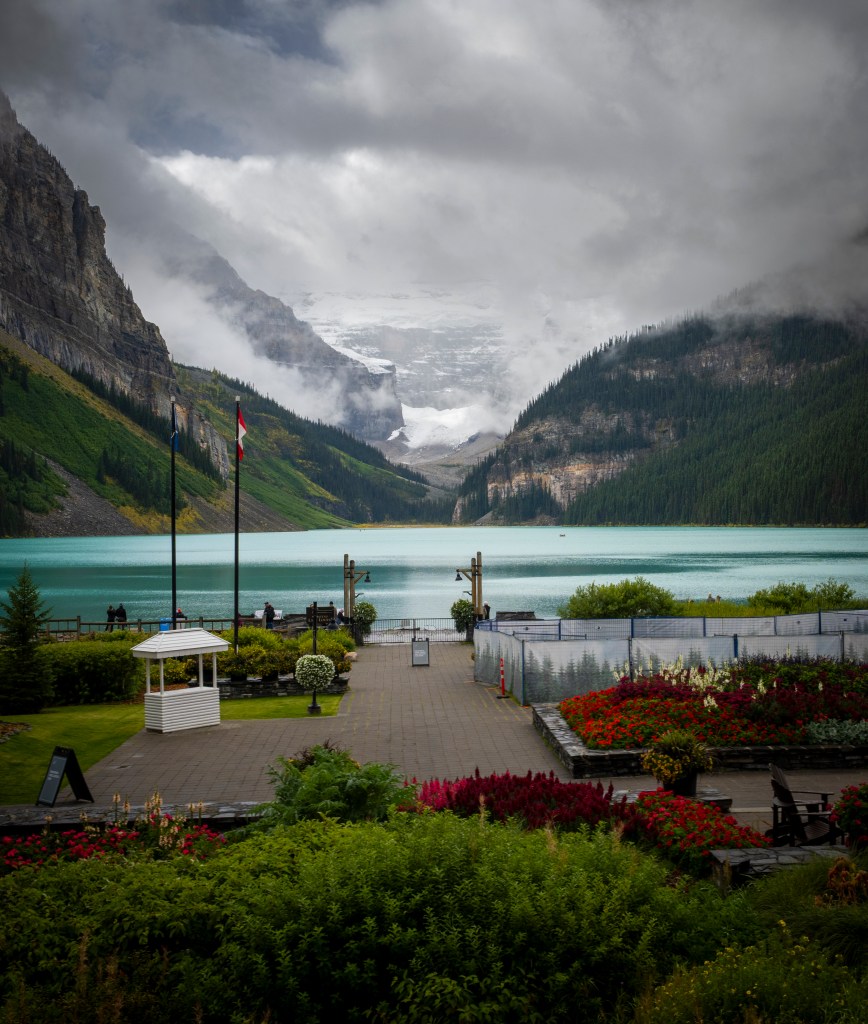
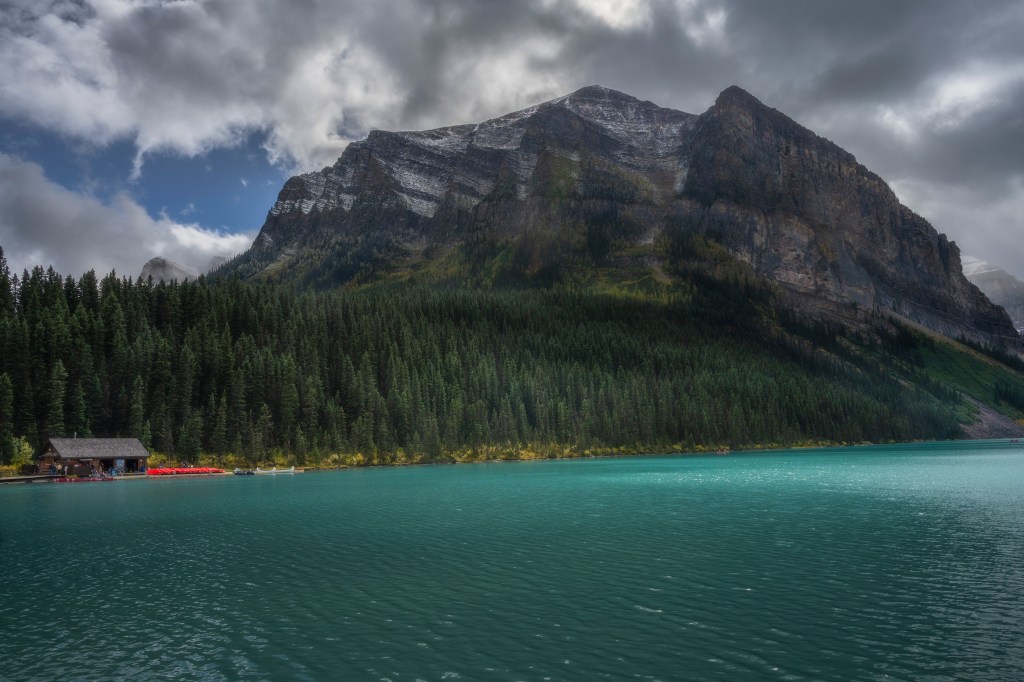
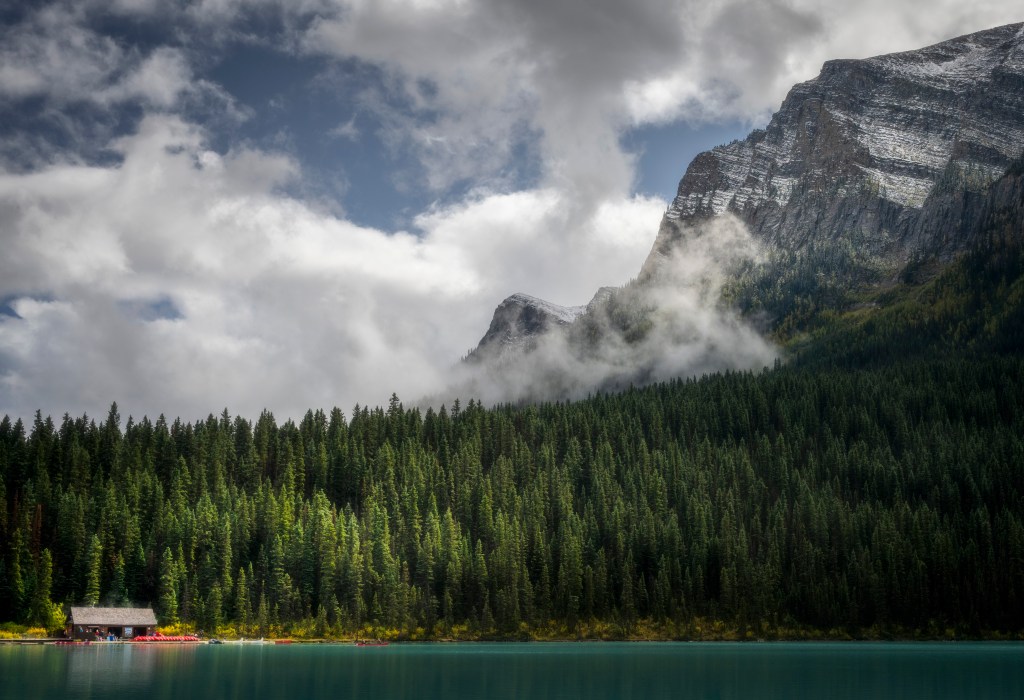
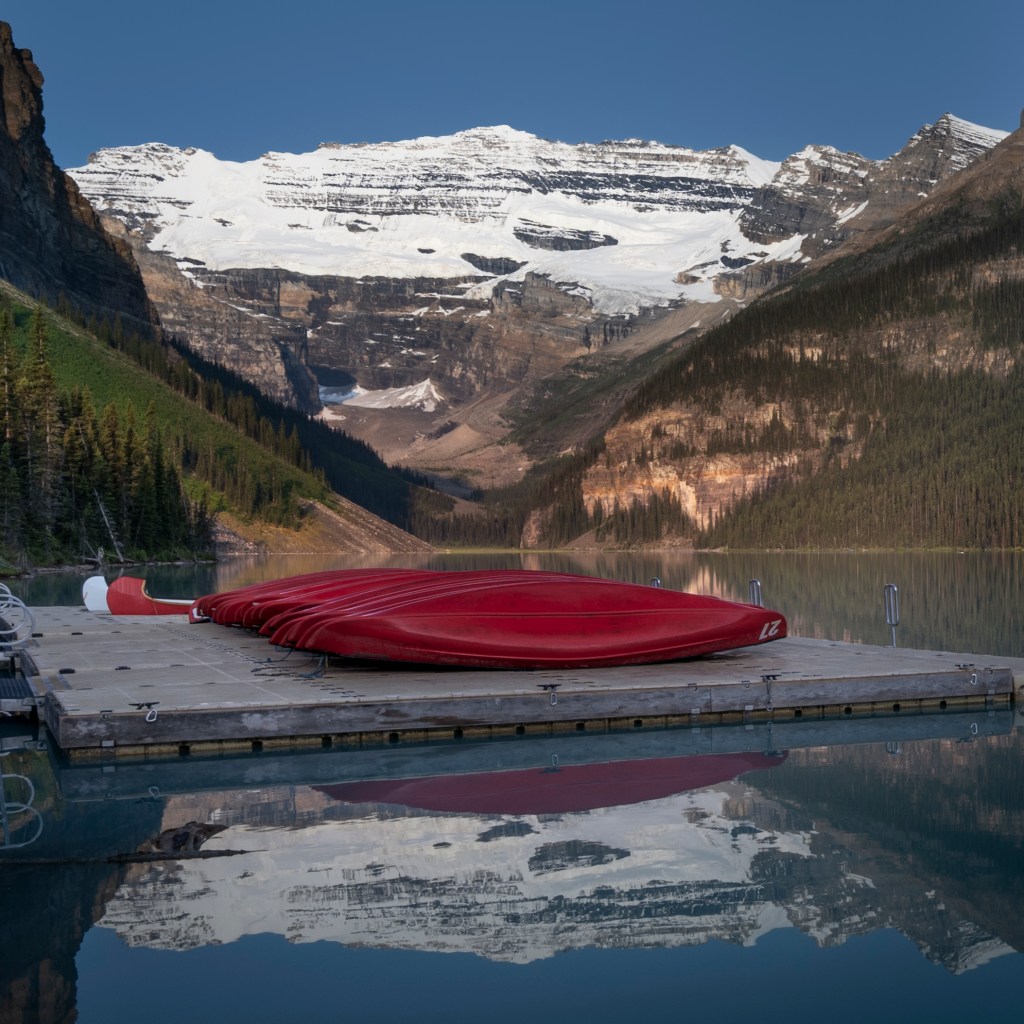
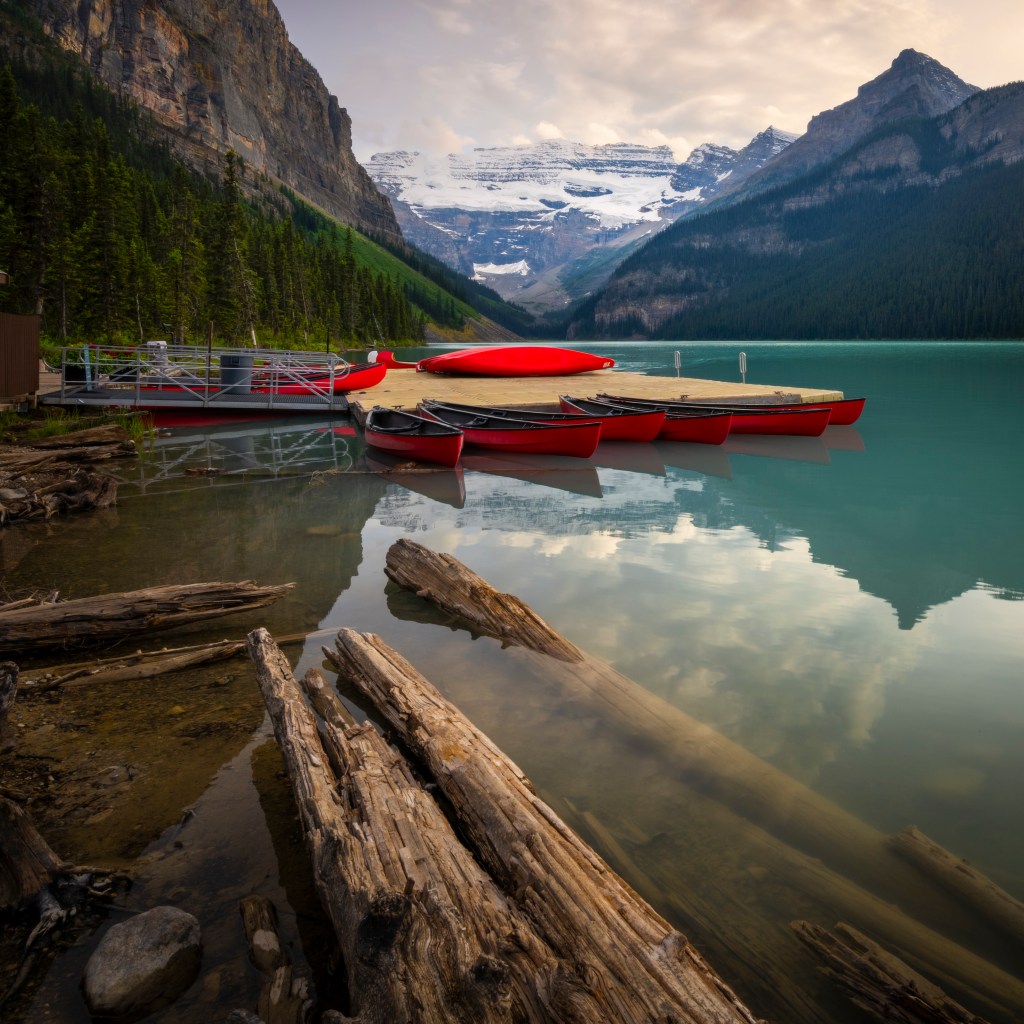
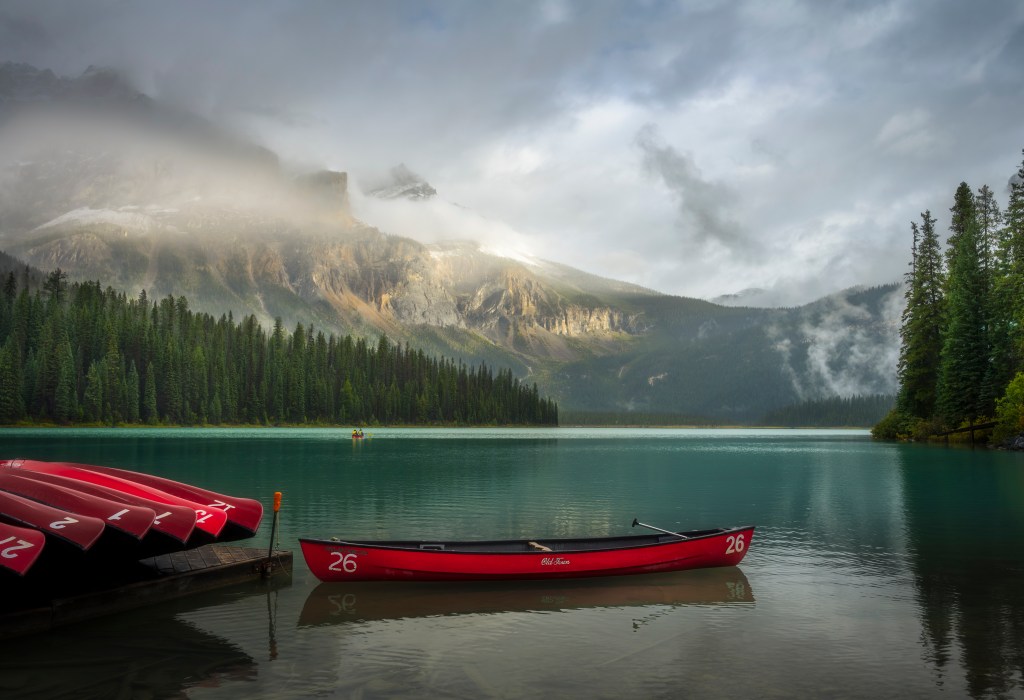
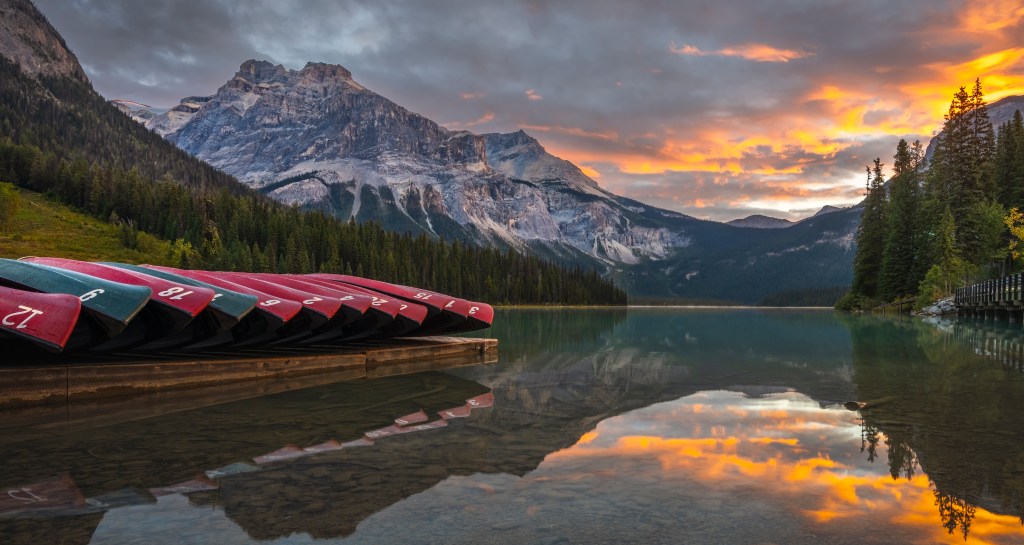
Don’t spend the whole morning locked on Mount Victoria (tempting, I know). Look across the lake to the canoe hut for a strong “sense of place” composition: the warm-toned building and red canoes against dark evergreens, with Fairview Mountain shifting into the background. Mid-morning often adds energy here—movement, rentals starting up, and little moments that make the scene feel alive.

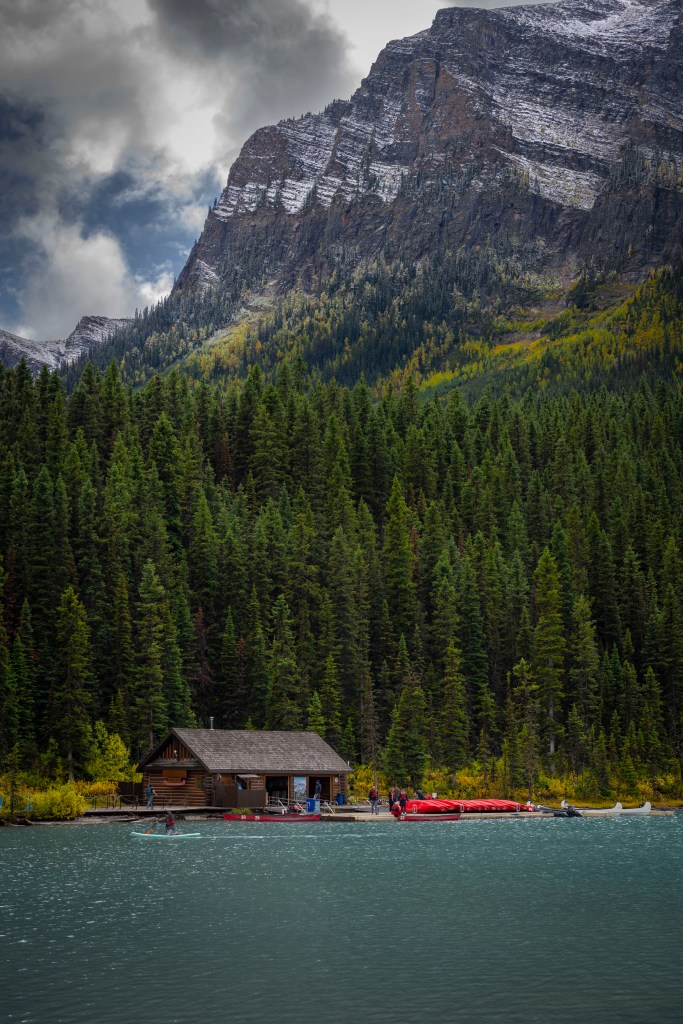

The Canoe Hut Up Close: Building a Layered Frame
No Lake Louise portfolio feels complete without the classic “red canoe foreground + mountain backdrop” frame—and this is one of the easiest places in the Rockies to make it happen. Work the scene in layers: start with water texture or reflections as foreground, place the canoes as a mid-ground subject, then let the peaks close the frame. If the shoreline is busy, simplify: shoot tighter, wait for gaps between people, and use the canoes to hide distractions.
Want more guides like this? Subscribe for new locations, composition breakdowns, and field-tested gear notes.
Photography Tips
- Lens Selection: Bring a wide-angle for the classic shoreline scene and a short telephoto for simplifying the frame and isolating specific details. From the ski hill across the Bow Valley, a long telephoto (I used a 100–400mm on a full frame camera) lets you compress layers and pull the lake into the composition.
- Best light: Lake Louise is primarily a sunrise location. With the sun rising behind you, the first light hits Mount Victoria and can produce clean alpenglow before the scene becomes high-contrast.
- Reflections: The calmest water is often pre-dawn through early morning. If you want a mirror surface, prioritize arriving early and watch for wind gusts that break the reflection.
- Time of year: Lake Louise is beautiful anytime of the year. Fall is great with the autumnal colors. However winter can also be very charming, especially shots of the canoe hut with snow on the trees.
- Tripod: Helpful for blue hour, sunrise, and any time you’re working with slower shutter speeds (especially when you want clean detail across the frame).
- Polarizer: Great for controlling glare and deepening color, but use it carefully on ultra-wide lenses—uneven polarization can create blotchy skies.
- Weather and layers: Expect alpine conditions. Even in summer, temperatures can be near freezing before sunrise, and weather can change quickly—dress in layers and protect your gear.
Nearby Destinations
Bow Lake and Mistaya Canyon
Extend your adventure by exploring nearby gems:
- Bow Lake: Not more than an hour north from Lake Louise is Bow Lake, one of my favorite locations on the Icefields Parkway. Well worth the journey for incredible views and so many photography stops.
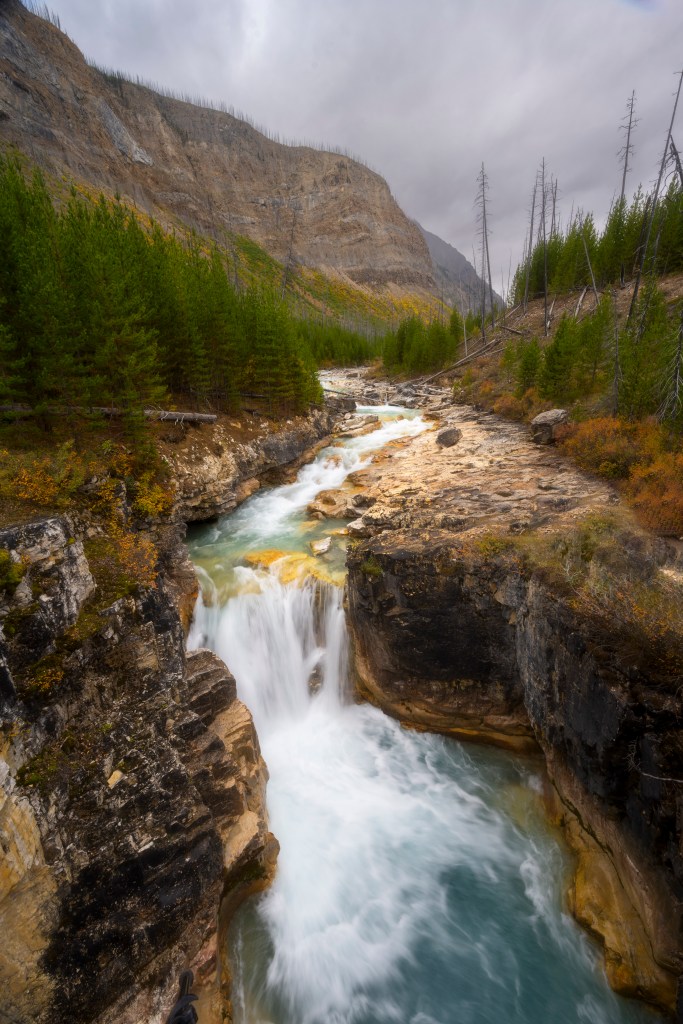
- Johnston Canyon: Located half an hour south of Lake Louise, Johnston Canyon is a very popular destination, and with good reason. Just get there early to avoid the crowds.
Have you been to any of these locations? Was this post helpful and useful? I would love to hear your comments and feedback.
If you enjoyed this post, consider subscribing for upcoming posts about travel and photography advice.
My Gallery
For more great photos of the Rockies, check out my Rocky Mountain Collection here.
I have also partnered with Pictorem, a professional printer who can ship prints anywhere in the world. They can print on a variety of media including metal, acrylic, paper and canvas. They offer a money back guarantee if you are not completely satisfied. If you see an image which you like and it is not available on Pictorem, just contact me here.
Here are some of my favorites.

To get notifications of my future posts subscribe here.
